Best vegetables to grow indoors
Garlic greens are a member of the allium family, which may help fight against breast cancer. Growing actual garlic bulbs indoors is a bit tricky, but you can easily grow garlic greens, which can be used just like scallions. Nice to have on hand for when you want to liven up with a sprinkle of something green! Start by purchasing a few garlic bulbs with small cloves, and don’t be afraid to buy a shattered bulb (i.e., one that’s started to burst or is fully pulled apart). Select a 4-inch pot with drainage holes at the bottom (a quart-size yogurt container with holes poked through the bottom will also work) and a small bag of potting soil. Fill the pot with soil to about half an inch below the top of the container. Break the bulbs into individual cloves (leaving the peel on), and push each individual clove about an inch into the soil, pointy end up. Plant about 12 cloves close together. Water well and place the container in a sunny spot. Make sure that the soil remains moist but not soggy. Green shoots should appear in about 1 week. Once the shoots are 8 to 10 inches tall (which will take a few weeks), clip off whatever you need with scissors. When the cloves start putting up more sprouts, compost the contents of the pot, fill it back up with fresh potting soil, and plant new cloves. (Each clove only sprouts good greens once; for a constant supply, you’ll need to keep re-planting).
Carrots are a good source of a variety of vitamins and minerals, including thiamin, niacin, folate, potassium, and vitamins B6, A, C, and K. They even have a decent amount of fiber at 3 grams per cup. Like avocados, carrots also supply high doses of carotenoids. In fact, carotenoids are named after carrots. Purchase carrot seeds and a pot or window box that’s at least a 1.5 square feet, with drainage holes at the bottom. Fill the container to within an inch of the top with a potting mix rich in humus. (What’s humus, you ask? It’s the organic material that remains after plant and animal matter decays) Water the soil before planting the seeds. Plant the seeds 1 inch apart in rows 6 inches apart from each other, pressing the seeds gently into the soil and covering them with a thin layer of soil. Place the container in an area that receives tons of light. Keep the soil moist, but not soaked. To help preserve moisture, you can soak some peat moss in water overnight and then spread it on top of the seeds. Expect the seeds to germinate (i.e., start sprouting) in about 2 weeks. Carrots are ready for harvest when they’ve grown to about 3/4 of an inch across the top (just below the green stem). If you can’t see the carrot itself, gently brush aside some soil around the stem so you can size it up. Though it may be tempting to see how big carrots can get, they’ll start to lose their sweetness and flavor once they surpass their peak size. To pick the carrots, grab them firmly at the root and wiggle them around a bit, then pull straight up. If you find that the soil is quite hard, water it and then wait an hour or so before retrying the harvest. Once the carrots have been pulled from the soil, remove the greens immediately, wipe off any excess dirt, and let them dry before storing them in the fridge.
Salad greens (which include iceberg, spinach, romaine, red leaf, and arugula) are chock-full of vitamins A, C, and K, and also contain folate and iron. Begin by purchasing starter plants or seeds from a local nursery (or order seeds online). Choose a planter box with drainage holes in the bottom and fill it with potting soil. Use your finger to poke holes into the soil about 4 inches apart. If using seeds: Sprinkle a few of them into each hole, then pat the soil back over the hole to cover them up. If using starts: Massage the roots before placing each start in a hole, filling in around them with soil. After planting seeds or starts, water the soil. When plants start to appear (if growing from seed), pull out all but the largest, healthiest shoots. Water the soil regularly, making sure that it always remains moist to the touch. To harvest mixed greens, pull off (or clip with scissors) only the outer leaves to allow the plants to keep growing, and be sure not to disturb the roots. Now you’re ready for a quick and easy salad for lunch, dinner, or even breakfast.
Microgreens (aka seedlings of herbs and vegetables) might have even more nutrients than their full-grown counterparts. A big bowl of mixed greens can be a stellar source of vitamins A, C, K, and folate. Start by purchasing a variety of seeds, such as radishes, kale, Swiss chard, beets, basil, and dill. Fill a shallow tray, no more than 2 inches deep (often called “seedling trays”) or a shallow pot with a drainage hole, and fill to the top with potting mix. Moisten the soil with water, making sure it’s damp but not wet. Sprinkle the seeds evenly over the soil (they should be close to each other but not touching). Sift a thin layer of soil over the top to cover the seeds. Using a spray bottle, lightly mist the soil. Place the tray on a sunny windowsill in a room that’s between 60 and 70°F (16 and 21°C). Mist or lightly water the soil daily so it remains moist; don’t let the soil dry out, but also make sure that it isn’t waterlogged. In about 3 to 5 days, the seeds will likely germinate — once they do, make sure they get 12 to 14 hours of light each day. Keep the soil moist at the roots, but avoid soaking the leaves. Once the seedlings have grown to 1 or 2 inches in height (expect this to take 3 weeks or more) and have about two sets of leaves, they’re ready to eat! To harvest the greens, hold them at the stem and use a pair of scissors to cut off the leaves, making sure not to cut into the root. By leaving the roots intact, you ensure that your greens will yield multiple harvests. Eat the microgreens right away or store them in a plastic bag in the fridge for up to 5 days.
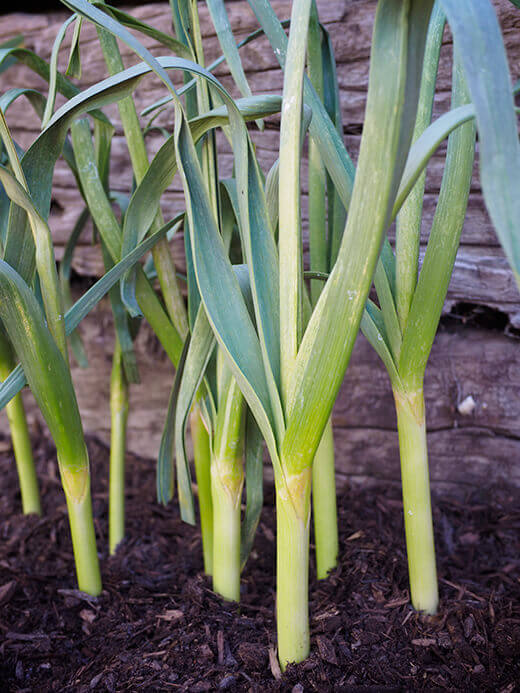
Scallions are part of the allium family of vegetables, which has been associated with cancer prevention and may help protect the body from free radicals that damage cells. Scallions win the prize for easiest kitchen crop. To get them growing, simply buy a bunch, wrap the bulbs together with a rubber band, and place the whole shebang (greens, bulbs, and all) in a glass with an 1 of water. Change the water daily. When new green shoots appear and the roots have doubled in length (in about 7 to 10 days), plant the scallions in a shallow pot or other small container. Keep the plants evenly watered (i.e., don’t let the soil get too dry before watering) and in full sun. Snip the green tops (leaving at least an inch or 2 of the plant in the dirt) as needed. To use the white part of the scallion, harvest the plants when they’re 6 inches tall. Gently pull the white clump from the soil. Washed and trimmed scallions should keep for a week in the refrigerator. To maximize freshness, wrap them in a moist paper towel and store them in a plastic bag. –TTN


Leave a comment